Showing posts with label self sufficiency. Show all posts

Sunday, February 13, 2011

Starting the Spring Garden

This past week I started our first "wave" of spring vegetables indoors. It felt great to finally be digging in some dirt and planning for the arrival of spring.


All of the seeds I started came from Baker Creek and are non-hybrid, non-GMO seeds. I planted 2 trays of onion seeds (Bronze d'Amposta, Red of Florence, Tropeana Lunga, and Yellow of Parma), Leeks, herbs (dill and basil), 2 flats of lettuce (Black Seeded Simpson, Lotta Rossa, May Queen, and Parris Island Cos), Pak Choy, Extra Dwarf, rhubarb and Asparagus, Mary Washington.


The lettuce and pak choy germinated in two days and has already started to fill out the cells.


I plan to keep everything indoors for two weeks, then repot them and move them to a cold frame. I will start more lettuce and greens in three weeks to keep a succession of these vegetables all season.

Friday, February 4, 2011

Cold Storage

I was very excited when Ken and Mac completed our cold storage room in 2010. They tore down 2 block walls and ripped out an unused shower stall, sink, and toilet to open up a space that would be big enough to hold 2 deep freezers and make shift shelves to hold winter squash, pumpkins, onion, apples, potatoes, and other produce that stores well. In Spring, Fall, and Winter, this room generally stays around 40 degrees which is the perfect temperature for the long term storage of crops. This low temperature also decreases the amount of electricity that the freezers use which is greener for the environment and keeps our electric bills lower. The cold storage room is located between the garage and the lodge, so every time I walk by it, I have the opportunity to admire the non-GMO, non-hybrid heirloom veggies we raised in our vegetable gardens this year.


My favorite crop that we grew for long term storage is the jarrahdale pumpkin. It is a slate, blue-grey pumpkin that weighs 6-10 pounds. Its shape is flat, ribbed, and very decorative. It is a good keeper. As a practical matter, it was very easy to grow, but the vines do require a large amount of garden space. Also, it is very easy to clean out and cook up because the flesh is smooth rather than stringy, and it has a very delicious flesh. These pumpkins are not available at traditional groceries, but they are sometimes available at farmer's markets in Fall.


I admired our jarrahdale pumpkins sitting in our cold storage for the past 4 months instead of eating them, so they were starting to spoil a little. The majority of the inside flesh was fine, but it was definitely time to do something with them.


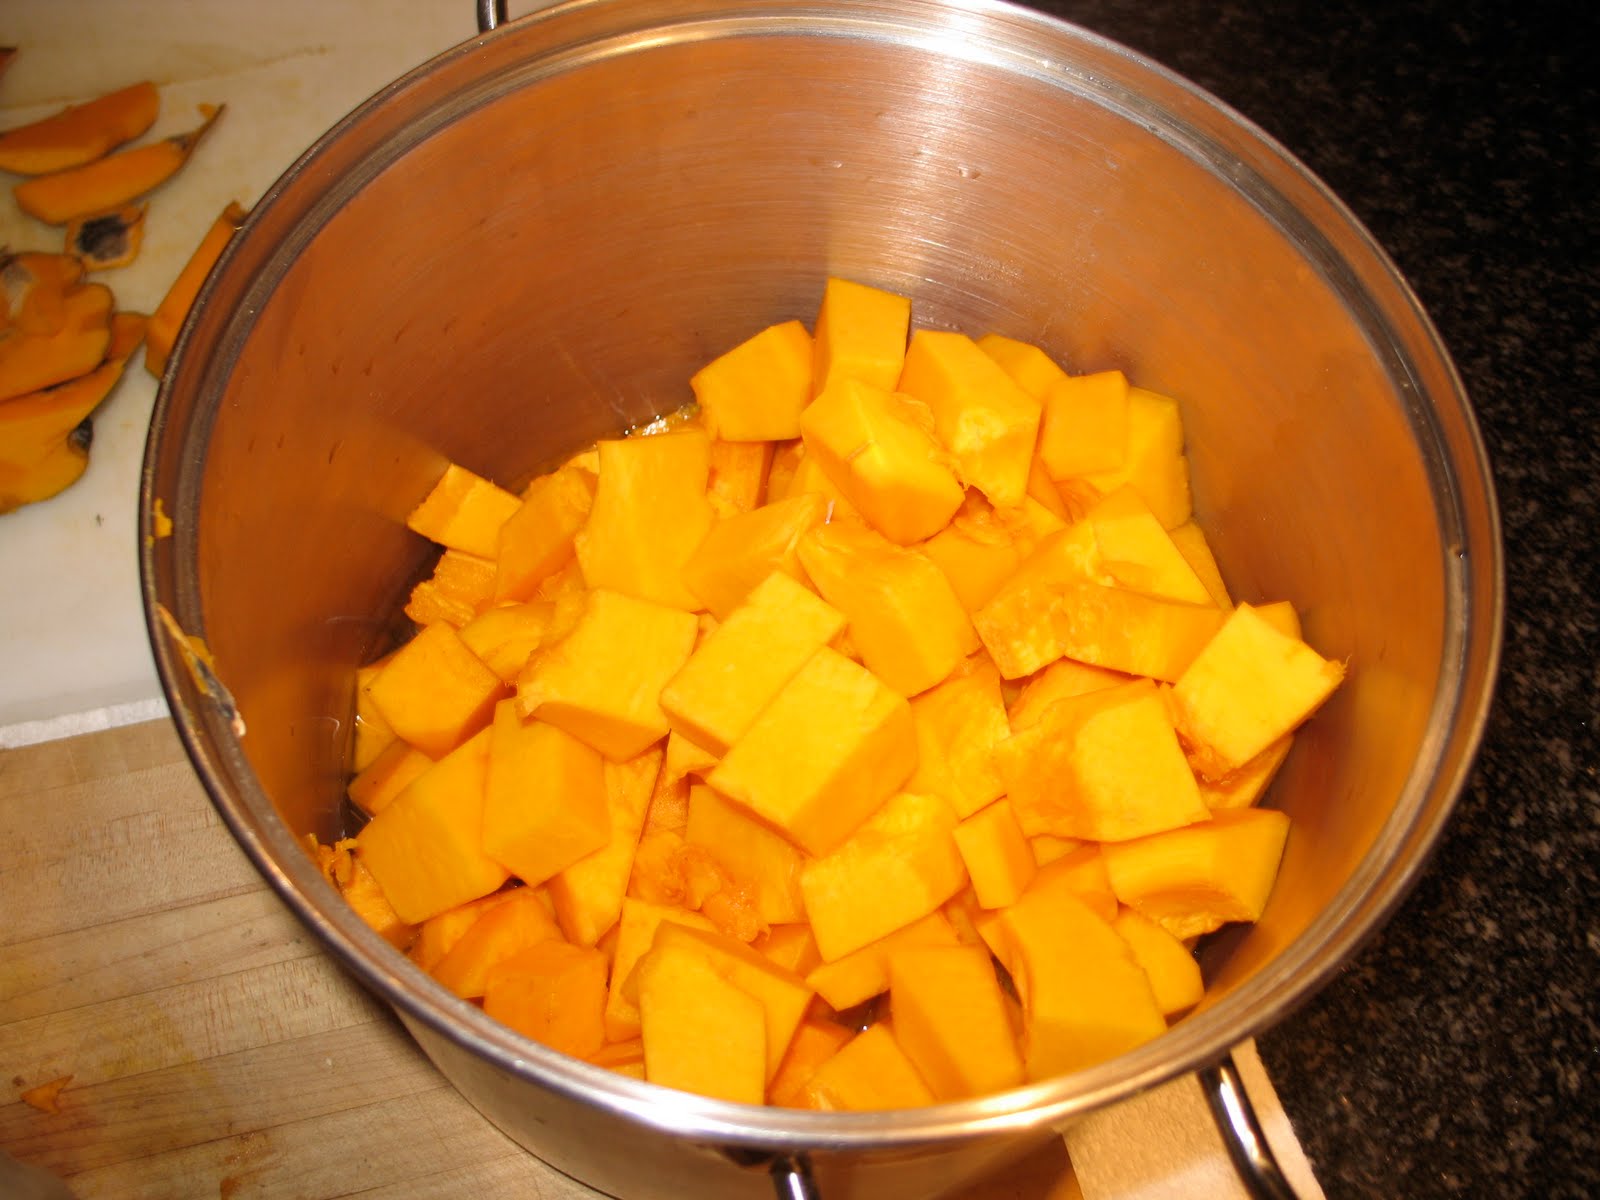
Ken cut open, seeded, and cubed the pumpkin.


Then, he placed the cubed pumpkin in a large stock pot and cooked it down. We will use the resulting pumpkin puree to make pumpkin soup tomorrow. The rest of the pumpkin puree will be placed in Ziploc bags and put in the freezer. We will use the puree this summer to make pumpkin bread for our guests at The Ponderosa Lodge.


Wednesday, July 21, 2010

A Full Day in the Kitchen

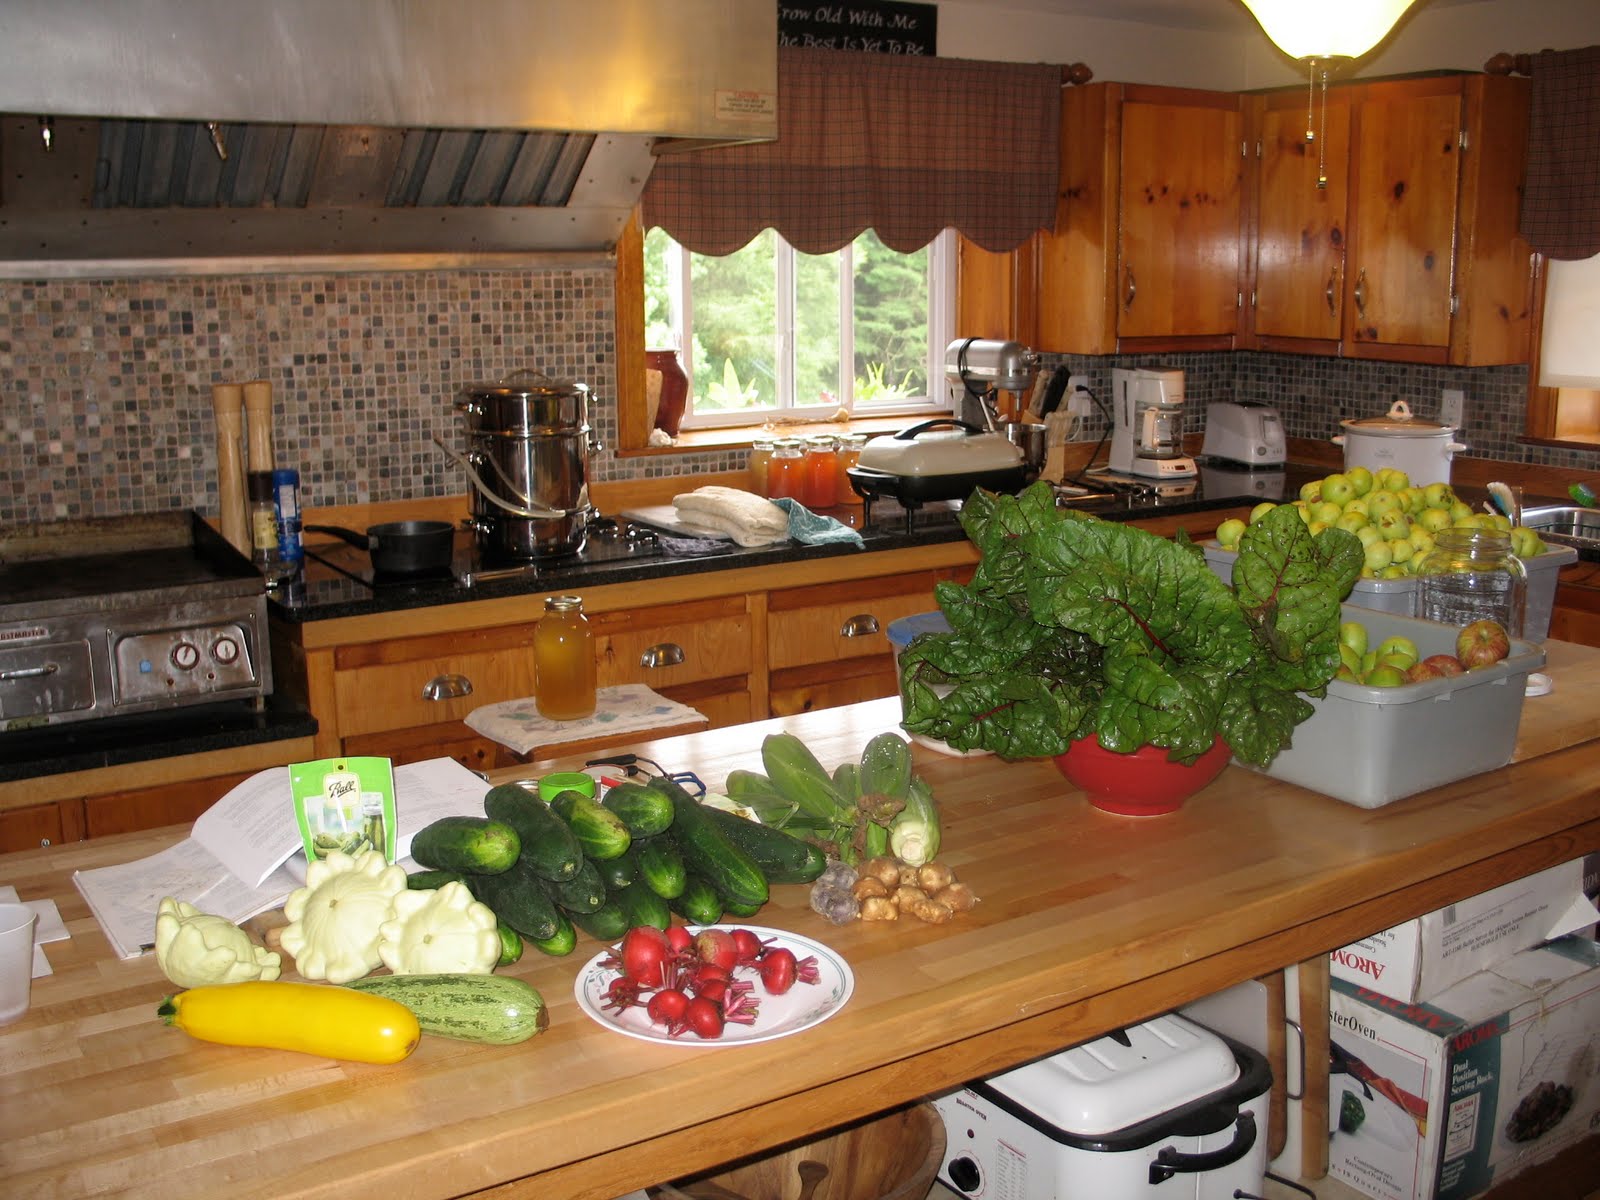
With the garden starting to come in steady now, I have begun preserving a lot of our harvest to store in the pantry. Today, I put a full day of work in the kitchen, canning, juicing, pickling and cooking. Today's harvest has, from left to right, zucchini (Golden and Striata d ' Italia), patty pan squash, cucumbers, beets, corn, potatoes, swiss chard, fall apples, and transparent apples.


The zucchini was grated and bagged for zucchini bread this weekend when I have guests at the Lodge. The patty pan squash was sliced, rolled in egg and flour, and fried in bacon grease. Everybody in our family loves it this way, but then what's not to like about something fried in bacon grease.


With half of the cucumbers, I made 6 quarts of pickle spears. I still have 8 left to eat with salads and raw. Of course, I'll probably have another half dozen ready to pick tomorrow. Looks like more pickling is in the future.


The beets were washed, blanched and the skins removed. I'll fix these for Liam's dinner tomorrow night. I'm not fond of beets, so Liam gets them all to himself. The eight ears of corn were blanched and cut from the cob for freezing. I love to add corn to soups in the winter. The potatoes were put in the crockpot with a pound of green beans Jorene picked yesterday, along with a ham bone. We had these for dinner tonight and they were delicious.

Next is my favorite vegetable, Swiss chard. It is a powerhouse of vitamins and minerals, with high concentrations of vitamin K, vitamin A, vitamin C, magnesium, manganese, potassium, iron, vitamin E, and dietary fiber. I use it in omelets, pizza, soups, and salads. My favorite way to prepare it is sauteed with garlic and onions with a handful of nuts. This is one of my Rainbow Swiss Chard beds, which it shares with beets and onions. I'll offer one tip about harvesting Swiss Chard. Don't weedeat around the raised bed the night before you plan to harvest Swiss Chard. I had to rinse the leaves three times to get all the little bits of grass out of the wrinkles.
I have two varieties of apples in the tubs. The first has thinnings from a fall variety. A friend asked me to help him thin his tree and in return I could keep what I picked. They are tart and firm, but make a great baking apple. I made two apple pies for some guests last weekend and they loved them. I'll freeze the rest of the apples for pies later in the year.

The second tub of apples are transparents. I juiced these in my juicer and made over 7 gallons of juice.

Tuesday, July 13, 2010

Chicks - Week 9

More pictures of our Freedom Ranger chickens, Pekin Ducks and White Holland Turkeys. I really love these Freedom Ranger chickens. Their foraging capabilities is much better than the Cornish Cross. I can't wait to see how the meat tastes, which will be soon. I plan to start butchering later this week.

One curious thing I noticed lately about the ducks is that they act as bouncers for the group. The seems to always be two chickens trying to decide who is the alpha chicken. A duck will actually get out of the pond, run across the field and break up any fights. It's never the same duck. I think the ducks in general don't like fighting. It's funny.

We also added 13 more turkeys to our farm last week. I plan to raise them for Thanksgiving, butchering them around 16 weeks. This will put them in the 20 - 25 pound range when dressed.


Tuesday, June 29, 2010

Harvest Meal - June 28, 2010

Yesterday, I made an awesome lunch for my family, all from our farm and garden. We had a pork tenderloin from last winter's hogs, Swiss chard, baby beets (for Liam), mixed salad greens, blueberries, sugar snap peas, shallots and garlic.


I roasted the pork tenderloin on a cedar plank along with the baby beets for 1.5 hours. When finished, the tenderloin medallions were topped with blackberry liquer sauce. I sauteed the shallots and homemade bacon and baked them in skillet cornbread. I cooked the Swiss Chard, sugar snap peas, and garlic with pine nuts and raisins for a delectable side dish. After all that cooking, the blueberries were simply eaten straight from the bowl with a splash of yogurt. Good food, straight from the farm.

Thursday, June 17, 2010

Chicks - Week 6

The chicks sure are growing. They love being in the fields now and spend most of their time grazing. I bought a kiddie pool for the ducks today. They say that you don't need a pond when raising ducks, but I thought they would enjoy playing in the pool. They took to it like ducks to water. Even the turkeys got in the pool. Enjoy the pictures.


Thursday, June 3, 2010

Chicks - Week 3

I apologize for writing this update late, but we were swamped this past week with guests at the lodge. So, the chicks are a little more than 3 weeks old now, and it was time to move them to their field pen. There, they can get exercise, sunshine and eat fresh grass and bugs. This saves on my feed bill by as much as 40% and produces a healthier bird.

Here they are in their field pen. The pen is 4' x 8', enough space for them to roam around inside without being too crowded. I'll keep them confined for a couple of days to get settled. Then, I will allow them to free range behind an electrified poultry net. I would also like to provide a small water pond for the duck to use for bathing. For now, I move their pen twice a day to give them fresh grass to eat and to lay on.


Saturday, May 22, 2010

Chicks - Week 2


It's the end of weeks 2 for our new chicks, and they sure have grown. I'm especially amazed at how fast the Peking duck grows. I can make out the different colors for the Freedom Ranger Broilers now. They are tricolor, redbro and yellow. I expanded the brooder floor space to give them more to move around. They are getting hardier now, so I keep the heat on at night, but turn it off during the day. Next week I will start letting them outside during the day to forage.

Saturday, May 15, 2010

Chicks - Week 1

After one week, our 56 chicks have grown dramatically. The four turkeys and the duck have started to show their size, with the duck now standing tall over the broiler chicks. We moved them back outside after the last frost, recently. They get fresh air and sunshine in the afternoon. They are eating and drinking machines, consuming 1.5 coffee cans of feed, about two pounds of fresh grass clippings and 2 gallons of water each day. Liam loves making the rounds every day to feed the chicks.


Tuesday, May 11, 2010

Goat Pictures

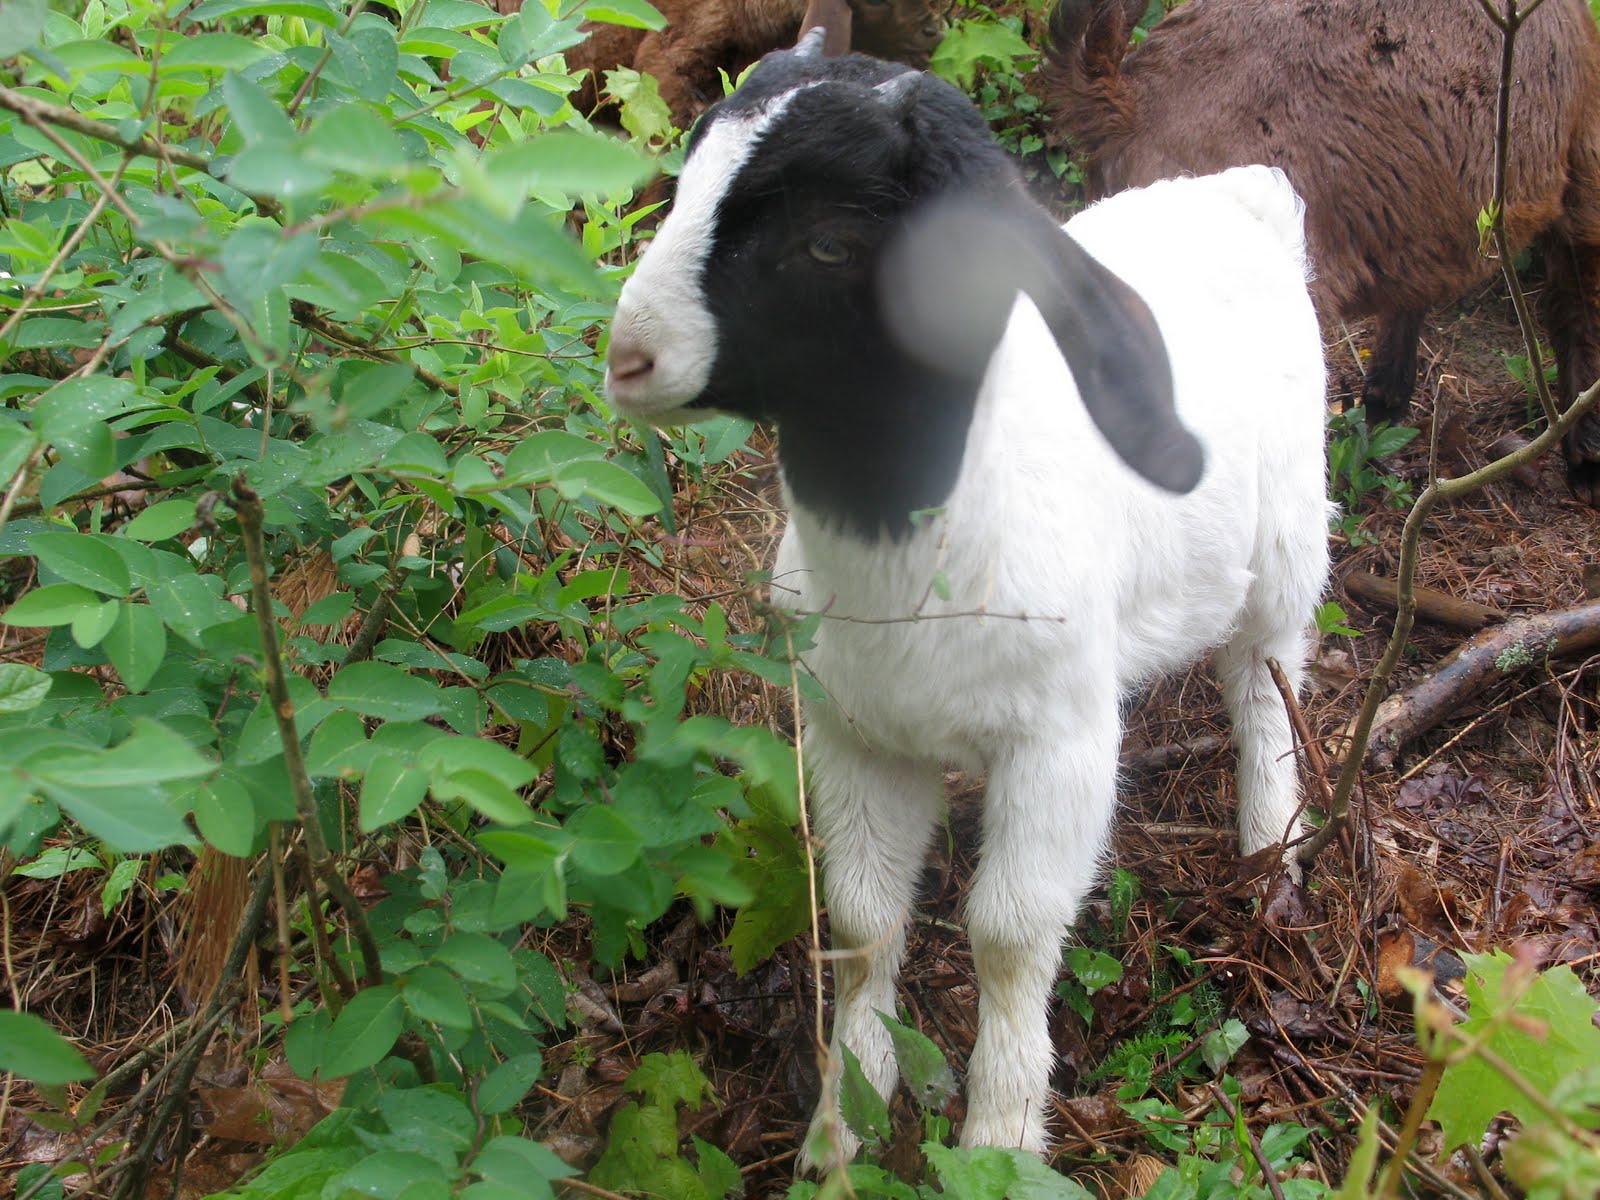
This morning, I let the boer goats free to graze on the hillside. I had to lead them out of the barn. Then, when I walked back in, they followed me back inside. So I led them back out and stood on the hill with them for awhile. They took to eating the brush immediately and seem quite happy. As promised, here are some more pictures of them.


Sunday, May 2, 2010

Rhubarb Recipes (or What do I do with all of this Rhubarb?!)

Rhubarb is in season in the beautiful mountains of West Virginia. It is one of the first crops that comes into season for us, so we always look forward to this time of year. Many Americans have never seen or tasted rhubarb because it is not widely available in the grocery. Essentially, it is a perennial that grows on a red and green stalk and looks similar to giant celery stalks. It has a bitter taste that is a nice complement to strawberries and other sweets. The rhubarb we use is a wonderful heirloom variety that is very old and has been growing for decades.


If you would like to try rhubarb but do not know what to do with it, our compilation of recipes is listed below (credit is given where credit is due).

Danish Rhubarb Liqueur from How To Make Danish Liqueur by Cheryl Long. (We were lucky enough to stumble across this recipe on the Throwback at Trapper Creek blog which also contains many other great rhubarb recipes).

4 cups fresh rhubarb, sliced
4 cups granulated sugar
3 cups vodka

Slice rhubard in 1/4 inch slices and combine with sugar in a large jar, glass bowl, or crock. Pour vodka over and stir well with a wooden spoon. Cap or cover and let sit 2-4 weeks. The color will turn rosy. Stir once or twice.

Strain off liqueur using a colander over a large bowl. Discard rhubarb. Strain through triple cheesecloth. Poor into bottles and cap. Let age at least 1 month. For a more mellow flavor, age 3-6 months. Makes 2 qts.


Ruby Port and Rhubarb Risotto with Sugared Strawberries (courtesy of Cooking Light magazine, May 2010, p. 196)

2 cups sliced strawberries
3/4 cup plus 1 Tbsp sugar, divided
2/3 cup ruby port
1 1/2 cups chopped rhubarb
3 1/2 cups water, divided
2 cups whole milk
1/4 tsp salt
1/8 tsp freshly ground nutmeg
2 Tbsp butter
1 cup uncooked medium grain rice
1/2 tsp vanilla extract
1/4 (2 oz) mascarpone cheese

Combine strawberries and 1 Tabsp sugar in a small bowl. Set aside.

Combine port and 1/4 cup sugar in a small saucepan over medium-high heat. Bring to a boil. Cook 7 minutes or until slightly thickened. Stir in rhubarb. Cook 7 minutes.

Bring 3 1/2 cups water to a simmer in a small saucepan (Don't boil). Keep warm over low heat. Combine milk, remaining 1/2 cup sugar, salt, and nutmeg in a separate saucepan; bring to a simmer. Keep warm over low heat. Melt butter in a large Dutch oven. Add rice to pan; cook 1 minute, stirring constantly. Stir in 1 cup hot water; cook 3 minutes or until liquid is nearly absorbed, stirring constantly. Add remaining water, 1/2 cup at a time, stirring constantly until each portion of water is absorbed before adding the next. Add milk mixture, 1/2 cup at a time, stirring constantly until each portion of milk is absorbed before adding the next (about 30 minutes total). Stir in vanilla; cook 1 minute. Remove from heat; stir in mascarpone until cheese melts. Place about 1/2 cut risotto in each of 8 bowls. Top each serving with 2 Tbsp port mixture and 1/4 cup strawberry mixture. Yields 8 servings.


Strawberry Rhubarb Ice Cream (courtesy of Cooking Light magazine, May 2010, p. 116)

2 1/2 cups whole milk
3/4 cup half and half
1 cup sugar, divided
3 large egg yolks
2 cups chopped fresh rhubarb
1/3 cup fruity red wine (or substitute cranberry juice cocktail)
3 cups chopped fresh strawberries

Combine milk and half and half in a heavy saucepan over medium-high heat. Heat milk mixture to 180 degrees or until tiny bubbles form around edge (don't boil). Combine 1/2 cup sugar and egg yolks in a large bowl, stirring with a whisk until pale yellow. Gradually add half of hot milk mixture to egg yolk mixture, stirring constantly with a whisk. Pour the egg yolk mixture into pan with remaining milk mixture; cook over medium-low heat until a thermometer registers 160 degrees, stirring constantly. Place pan in a large ice-filled bowl for 20 minutes or until custard cooks completely, stirring occasionally.

Combine remaining 1/2 cup sugar, rhubarb, and wine in a saucepan over medium-high heat; bring to a boil. Reduce heat, and simmer 8 minutes or until rhubarb is tender and liquid is syrupy. Remove from heat; let stand 10 minutes. Combine rhubarb mixture and strawberries in a blender; process until smooth. Strain mixture through a sieve over a bowl, pressing with a wooden spoon; discard solids. Stir rhubarb mixture into custard mixture.

Pour custard into the freezer can of an ice cream freezer; freeze according to manufacturer's instructions. Drain ice water from freezer bucket; repack with salt and ice. Cover with kitchen towels, and let stand 1 hour or until firm. Yields 10 3/4 cup servings.


Organic Insecticide
Rhubarb leaves can be used to make an effective organic insecticide for any of the leaf eating insects (cabbage caterpillars, aphids, peach and cherry slugs, etc).

Shred 3 lbs rhubarb leaves.

Boil in 1 gallon of water for 30 minutes.

Strain into a bucket to cool

In a small saucepan heat to boiling point 2.5 quarts of water and mix in 4 oz of softened natural soap ends.

Add to the strained leaf mixture, stir vigorously, and allow to cool.

Pour into a sprayer. I strained it again through a colander to make sure there were no pieces to clog the sprayer. Spray onto desired plants. Any unused spray should be used within a day or two.

Tuesday, April 27, 2010

Eggs are my Currency

Today, I traded a friend 3 dozen eggs for a large bale of mulch hay.
Tomorrow, I'm going to another friend's farm to pick rhubarb. She has a huge "community" patch of rhubarb and she lets me pick all I want. In return, I'll give her several dozen eggs. I love bartering for goods and services. Usually, my currency of trade is a dozen eggs. I've traded eggs for a bale of hay, fresh garden veges, wild mushrooms, a little help moving a dresser, or just about anything else. We have 2 friends who help us clean the lodge after guests leave. They get paid and also get a gift of a dozen eggs.

Sometimes, we get homemade jam or hot sauce from a friend. They get a dozen eggs in return. If I'm baking bread at the time, they might get a loaf of bread instead. But, normally, we give a dozen eggs. It's a good that we have in abundance and readily available. Besides, everybody likes farm fresh eggs.

It's fun trading and bartering with friends. It lends to my feeling of self-sufficiency by not relying on money. Giving a loaf of bread or a dozen eggs is always a nicer gift than a couple of dollars. I've often helped friends throw hay in the barn or cut some firewood just for a cold drink. Everything doesn't have to rely on the almighty dollar. Now, if I could just get Lowes to take a dozen eggs for a box of screws.

Monday, April 26, 2010

Organic Gardening

This weekend, Liam and I helped Jorene spread compost over her flower beds. We make lots of compost here on the farm. I mix bedding material and manure from the animals with leafs, straw, kitchen scraps, and wood shavings from a sawmill nearby.

The benefits of using organic homemade fertilizers are numerous. First, we are re-using materials on hand that would otherwise be considered waste materials that would clog up the landfills. Additionally, by using a natural fertilizer, we do not contribute to the pollution of our land and waterways through the leaching of chemical fertilizers into the ground. Finally, natural fertilizer is cost effective because it is nearly free and readily available in large amounts, which helps us achieve our overall goal of self-sufficiency on the farm. It also helps reduce our garbage removal bills because we would otherwise have to pay to have it hauled off.


This pile of compost had been aging since last fall. We have a large pile which is turned over with a tractor and bucket a couple of times during the aging process. This allows air and moisture into the pile and gets everything thoroughly mixed.


Here we are, hauling a load of compost up to the flower beds. Liam loves driving the tractor.


Another way we feed our plants naturally, is with manure tea. Manure tea is rich in nutrients, especially nitrogen. It feeds the plants naturally, helps build stronger plants that can fight off disease and pests, and works as a soil amendment. To start, I put a couple of shovel fulls of rabbit manure in a burlap bag.


This gets floated in a 55 gallon barrel for a couple of days. Every time I walk by the barrel, I'll stir the mixture and get some air in the tea.


After the tea has "brewed", the manure bag is removed. It can be spread on the garden or added to the compost pile. The tea is used to water the gardens and is a great source of macro and micro nutrients to our flowers and vegetables.

Sunday, March 28, 2010

Clearing the Land

When we first moved into The Ponderosa Lodge, the lodge was surrounded by pine trees. This created a beautiful canopy when driving up to the lodge, but it kept the lodge dark and cool. We were so crowded that we couldn't see cars pull in the driveway and didn't know people were here until they walked up to the door. We, basically, had a 20 minute window of sunlight in the front window when the sun was peaking between the trees. We had to do some clearing.


Pines trees in the front and back in 2005.


We first cut down 7 of the pine trees in the front and 5 large trees in the back. Then we cleared some locust across the driveway. This opened up the lodge and we realized we had a view of the holler below.

Last week, we got 12 more trees removed to increase our view of our fields and open the lodge up for more sunshine. We plan to add solar panels to the roof for hot water and need a little more sunshine.

View from our bedroom window.


Tom attaches a cable to direct the tree's fall.

Tom is a good friend and a great person to know. He has his own wood mill and milled all of the trees we have cut down here into lumber. All of the improvements we have made to the lodge have utilized lumber from our property. We trade lumber with Tom in return for his help in cutting down the trees. He takes the large trunks, while the tops and most of the branches get cut into firewood for my friend Scott. The smallest branches are then hauled to the back edge of our fields for brush piles for wildlife.